
Tips for Making the Best Homemade Ice Cream
With triple digit temperatures dominating this summer here in Texas, we thought we would share tips for making the best homemade ice cream for a cool summer treat. There is nothing better!
When you are making homemade ice cream, remember to keep Tasty Clean products close by to keep hands and utensils clean, especially if you are using the old-fashioned ice cream makers that require your attention, usually in the garage or on the patio. Get your supply of our delicious flavors here.
Making Your Own Homemade Ice Cream
Homemade ice cream is fresh, delicious and fun to make. What’s more, you can customize your flavors or use the best-quality ingredients you can find. But it can be tricky to get ice cream to have that perfect firm, yet creamy consistency that is the trademark of good ice cream. Follow these tips for making the best homemade ice cream this summer.
Start With the Best Ingredients
Ice cream is only as good as the ingredients used to make it. So if you can afford it, buy organic milk and cream and free-range eggs, making sure that everything is as fresh as can be. If you’re adding flavorings or ingredients, such as chocolate, vanilla or fruit, spring for high-quality products. For instance, real vanilla, or even actual vanilla beans, make far better vanilla ice cream than imitation vanilla.
Save Fat and Calorie Cutting for Later
If you’re like most people, you try to watch what you eat and buy low-fat versions of cheese, milk and other foods. But ice cream depends on a high-fat content to create a creamy texture that won’t get icy and gritty in the freezer. Once you get adept at making ice cream, you can experiment with using lower-fat milk products, such as half-and-half instead of heavy cream, but be aware that the texture and flavor won’t be nearly as rich and delicious as a full-fat version. On a diet? Make ice cream an occasional treat, and serve yourself a smaller portion.
Know When to Add Flavorings
Flavorings, especially extracts or alcohol, should be added when the cooked custard has cooled. Don’t add them to the custard when it’s hot, or the flavors will deteriorate and won’t be as pronounced. You could even wait to stir them in until right before you pour the ice cream base into the ice cream maker.
Thoroughly Chill the Custard
Many ice cream recipes call for making a cooked custard out of eggs, sugar, and milk. After you’ve made the custard, it’s important to chill it in the refrigerator until it’s as cold as possible before putting it into your ice cream maker. Some experts even recommend “aging” the mixture overnight in the refrigerator, which will enable the mixture to be aerated as much as possible in the maker, yielding the creamiest, smoothest ice cream.
Freeze the Bowl
Speaking of freezing, if you’re using the type of ice cream maker that comes with a freezer bowl, make sure to freeze this bowl for at least 24 hours before making ice cream. If the bowl is not cold enough, chances are your ice cream will never freeze.
Start the Motor First
Particularly when using an ice cream maker with a freezer bowl, it’s important to turn on the motor before pouring into the ice cream base. The bowl is so cold that the mixture will freeze immediately upon contact, so you’ll want it to already be in motion so that the ice cream won’t freeze onto the bowl in a chunk.
Use Mix-Ins Wisely
Adding candy pieces, nuts or dried or fresh fruit to your ice cream can add a whole new flavor and texture dimension. Mix-ins should be small, around the size of a chocolate chip, so the ice cream maker can incorporate them into the frozen ice cream. Chill them thoroughly before adding them to the ice cream, and only add them when the ice cream is already completely frozen. The ice cream maker won’t need more than a minute or two to stir them in.
Keep It Creamy
A common complaint about homemade ice cream is that it gets hard and icy when it’s stored in the freezer. There are several ways to keep your ice cream from freezing solid in the freezer. David Lebovitz, author of the book, The Perfect Scoop, recommends adding a few tablespoons of alcohol (such as a fruit liqueur to fruit-flavored ice cream, or vodka when you don’t want an alcoholic flavor). Sugar, corn syrup or honey, as well as gelatin and commercial stabilizers, can all keep your ice cream at a softer consistency. Ice cream also stays softer when you store it in a shallow container, rather than a deep tub, and cover the surface of the ice cream with plastic wrap to keep ice crystals from forming.
With a little practice and some good recipes (whether it’s classic Vanilla or an adventurous flavor like Ovaltine ice cream), you’ll be well on your way to making delicious homemade ice cream that will delight your friends and family.
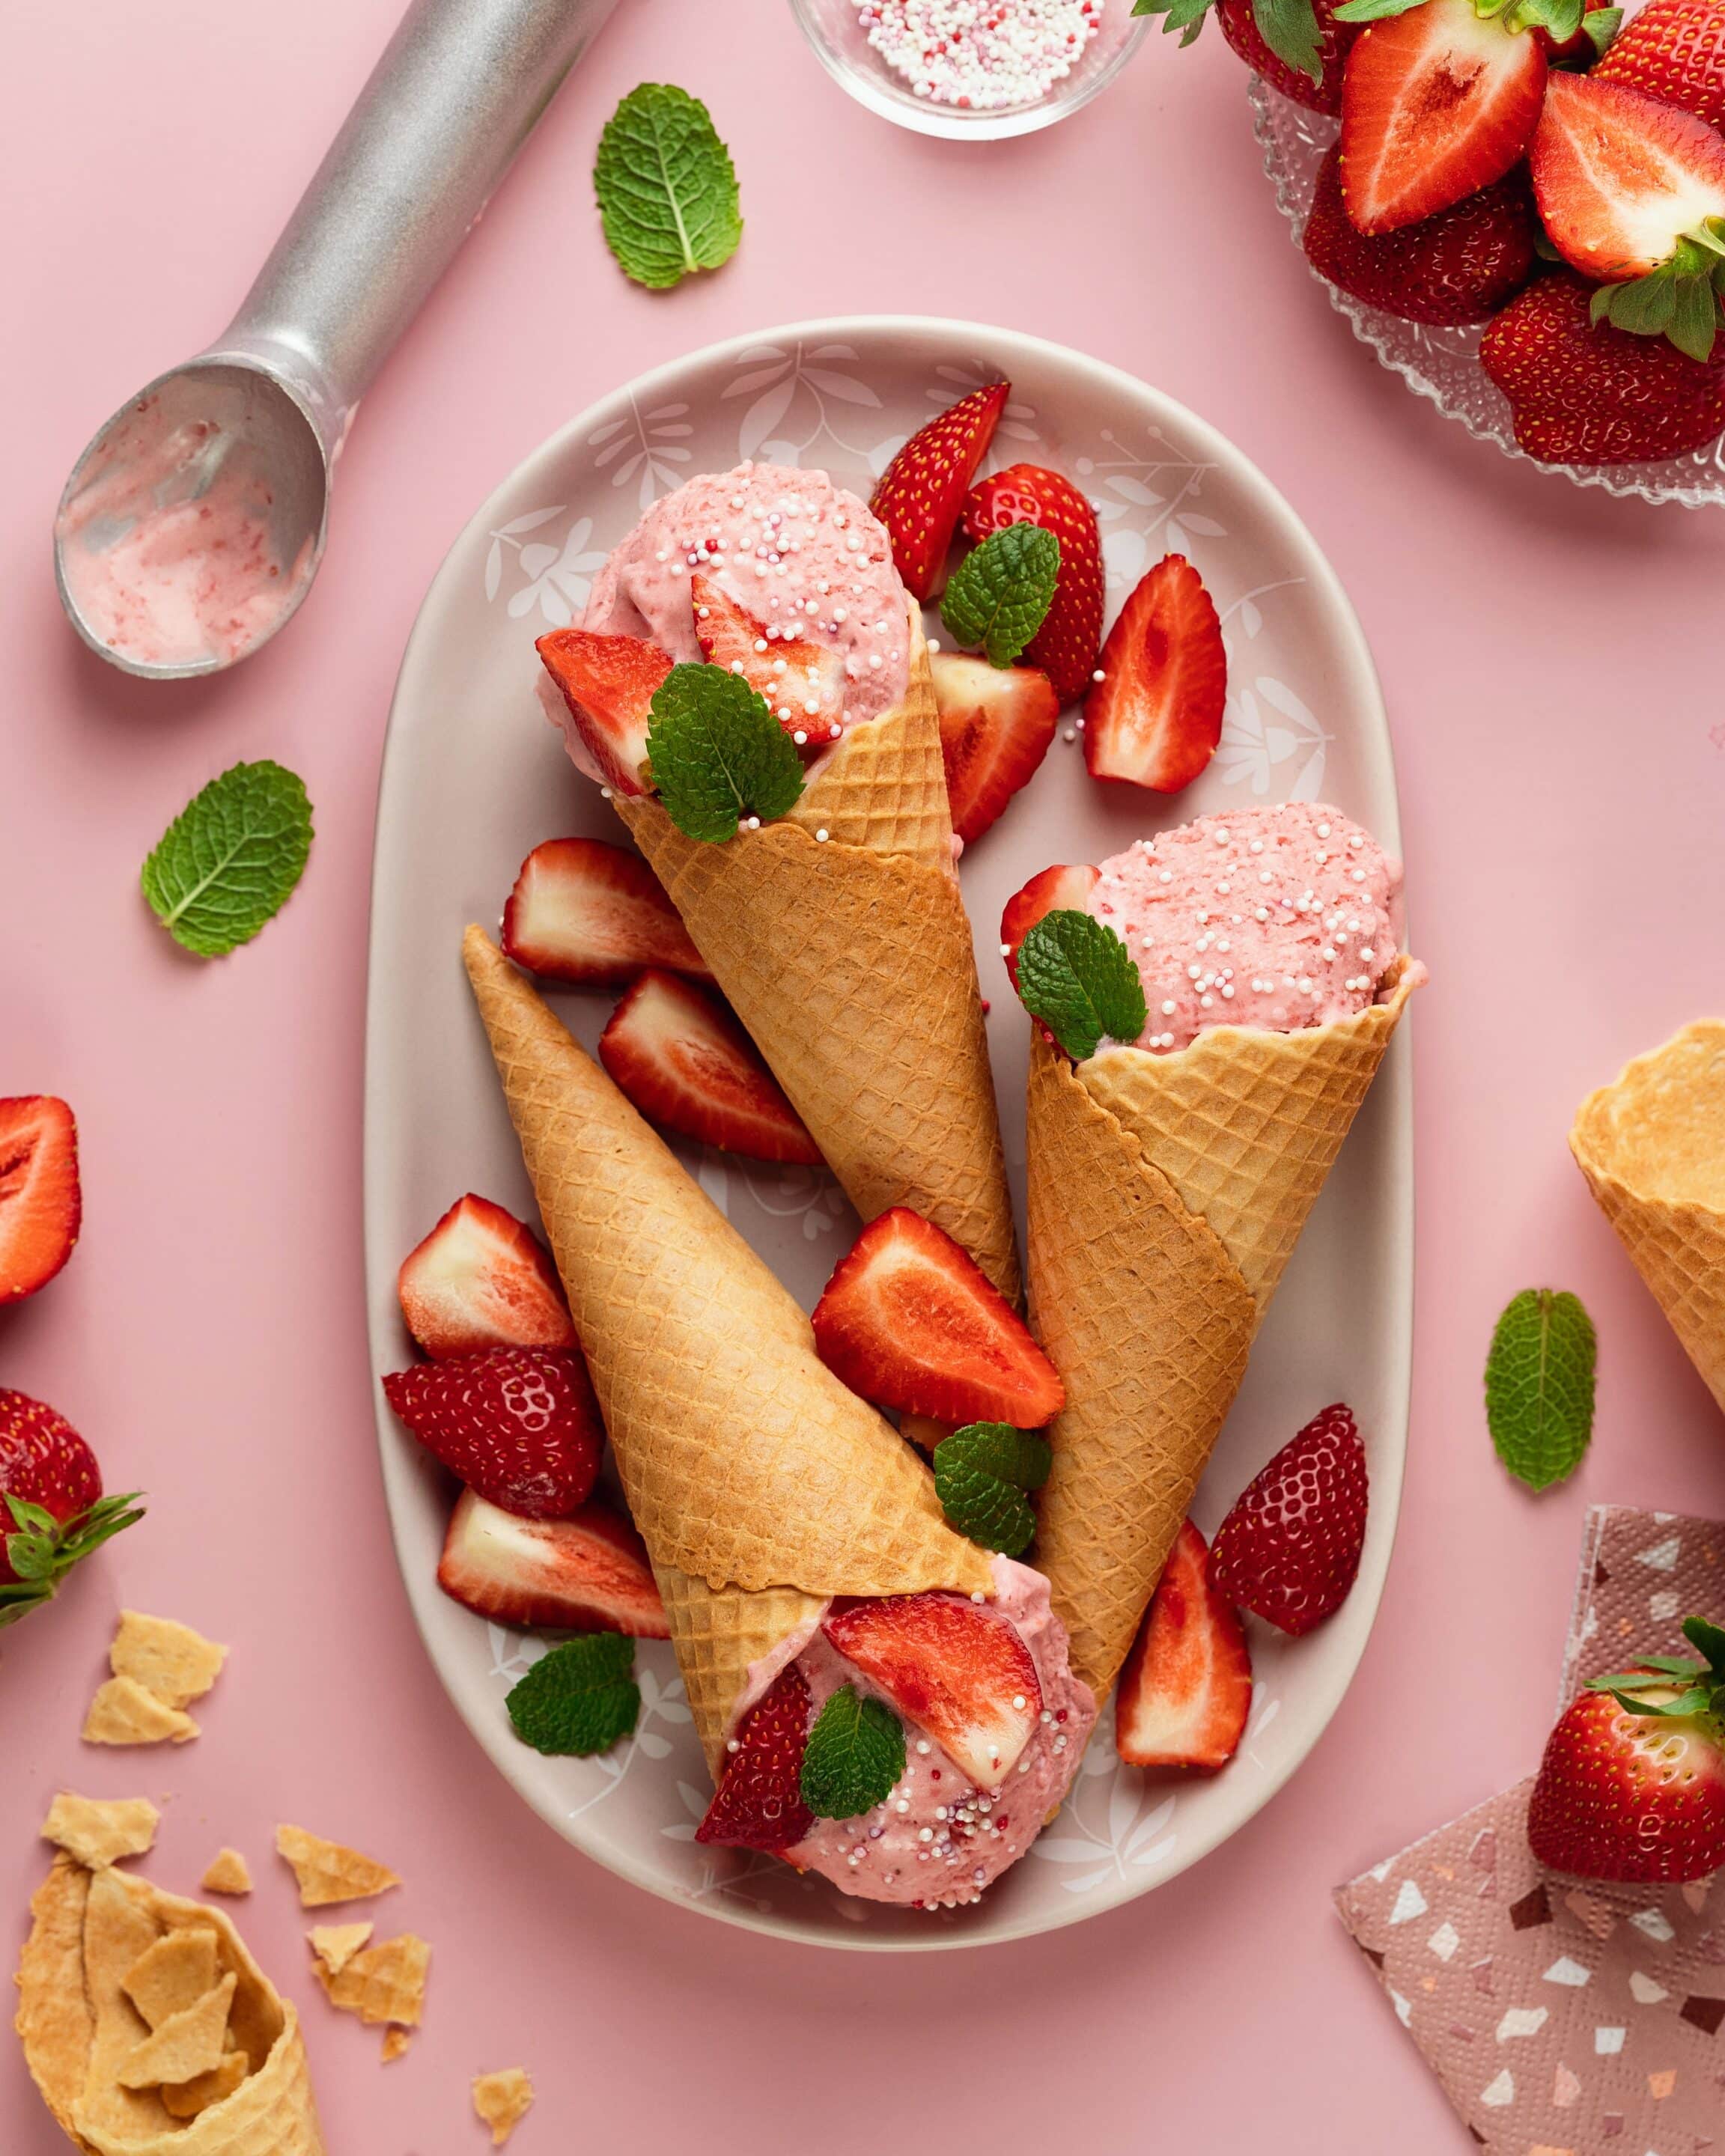
A BONUS Recipe - Strawberry Ice Cream!
Strawberry ice cream is a great choice when sweet, red strawberries are in peak season. With a little bit of planning and an ice cream maker, you can create a rich and creamy treat that tastes better than anything you can find in a grocery store.
Ingredients:
- 3 cups strawberries
- 4 tablespoons lemon juice
- 1 1/2 cups granulated sugar
- 1 1/2 cups whole milk
- 2 3/4 cups heavy cream
- 2 teaspoons vanilla extract
- 1 teaspoon food coloring
Steps to Make Strawberry Ice Cream
- In a medium bowl combine the strawberries with the lemon juice and 1/2 cup of the sugar. Gently stir and allow the strawberries to release their juices for about 2 hours at room temperature.
- Strain the berries, reserving the accumulated juices.
- Divide the berries in half. Mash or puree half of the berries, and leave the remaining berries whole. Set the two bowls aside.
- In a medium bowl combine the milk and remaining 1 cup of sugar until the sugar is dissolved.
- Stir in the heavy cream, the reserved strawberry juice, the mashed strawberries, and the vanilla extract. This ice cream will have a natural appearance of a very pale pink. If a deeper pink hue is desired, add a few drops of red food coloring.
- Churn the ice cream according the manufacturer’s directions, about 20 to 25 minutes.
- Five minutes before the mixing is completed, add the reserved sliced strawberries and allow them to mix in completely.
- Spoon the churned ice cream into a freezer-safe airtight container. Place in the freezer for at least 2 hours to firm before scooping and serving.
Tasty Clean is a Tasty Way to Get Rid of Unwanted Germs!
Remember that no matter what treats you are mixing up this summer, healthy oral care habits is an essential step in caring for the items that we use every day. Bacteria, tarter and calculus can build up on removable orthodontic devices making them uncomfortable and unhealthy to wear! By simply spraying the item with Tasty Clean, you are preventing stinky bacteria and plaque from setting up shop on your appliances. With the natural compounds of vinegar having acetic acid, plaque and bacteria are eliminated which means no funky odors or plaque buildup. Tasty Clean is handy and convenient so you can take it anywhere… all summer long! Stock up on your summer supply here!
Recipe Source: https://www.thespruceeats.com/strawberry-ice-cream-5190417
Article Source: https://www.thespruceeats.com/tips-for-making-ice-cream-at-home-909196